
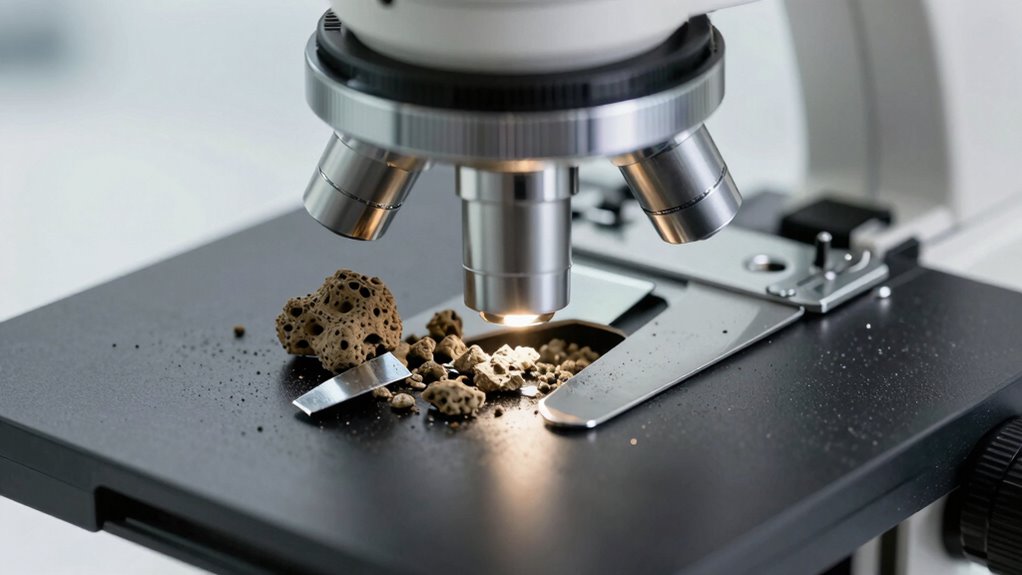
When inspecting wear debris under a microscope, look for color, surface texture, and shape. Metal particles tend to be shiny, metallic, smooth, and may have crystalline features, while dirt particles are dull, rough, and irregularly shaped. Use magnification around 200x–500x, along with proper angled lighting to highlight surface details. If you’re unsure or see complex materials, further analysis can help. Keep exploring to master fast, accurate identification techniques.
Key Takeaways
- Examine particle color and surface shine; dirt appears dull and rough, metal debris is shiny and smooth.
- Use magnification around 200x–500x to observe surface texture and shape details.
- Proper lighting, like oblique or diffuse illumination, enhances surface features and contrast.
- Metal fragments often have sharp edges and crystalline surfaces; dirt particles are rounded and porous.
- Conduct quick chemical tests or note adhesion patterns to differentiate organic dirt from metallic debris.

DEWALT Grease Gun 20V MAX, Cordless Electric Grease Gun 42” Hose, 10,000 PSI, Variable Speed Triggers, Tool Only (DCGG571B)
DEWALT cordless grease gun can power through clogged grease fittings with a motor that delivers up to 10,000...
As an affiliate, we earn on qualifying purchases.
How to Quickly Distinguish Dirt From Metal Debris
When examining debris under a microscope, it’s important to quickly tell dirt from metal fragments. One key method involves analyzing the chemical composition. Dirt typically contains organic matter, minerals, and soil particles, which can be identified by their unique chemical signatures. Metal debris, on the other hand, generally exhibits a distinct metallic sheen and contains elements like iron, aluminum, or copper. The environmental context also offers clues; dirt is often associated with soil or dust, while metal fragments may originate from machinery or wear of metal parts. By combining a quick assessment of chemical composition with knowledge of the environment, you can efficiently distinguish dirt from metal debris, ensuring accurate analysis without the need for extensive testing. Recognizing support and boundaries in handling debris can also help prevent misidentification and promote safety. Additionally, understanding the contrast ratio and color fidelity of the materials can aid in differentiating between metallic and non-metallic debris, especially under different lighting conditions. Being aware of material properties can further enhance the clarity of your identification process, making it easier to differentiate debris types rapidly and accurately. Incorporating spectroscopic techniques can provide rapid, non-destructive analysis to further confirm material identity. Developing a keen eye for material contrast can also improve your ability to distinguish debris quickly in various settings.

LUMAX LX-1152 Black Heavy Duty Deluxe Pistol Grease Gun with 18" Flex Hose, Handy 3-Way Loading - Fill with Standard Cartridge, Suction or Bulk Fill. Convenient One-Hand Operation for Easy Greasing.
HARD-TO-REACH: Comes with 18" flex hose extension for hard-to-reach fittings. Convenience of one-hand operation for easy greasing. Fit...
As an affiliate, we earn on qualifying purchases.
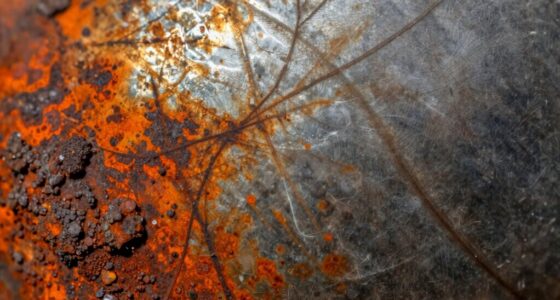
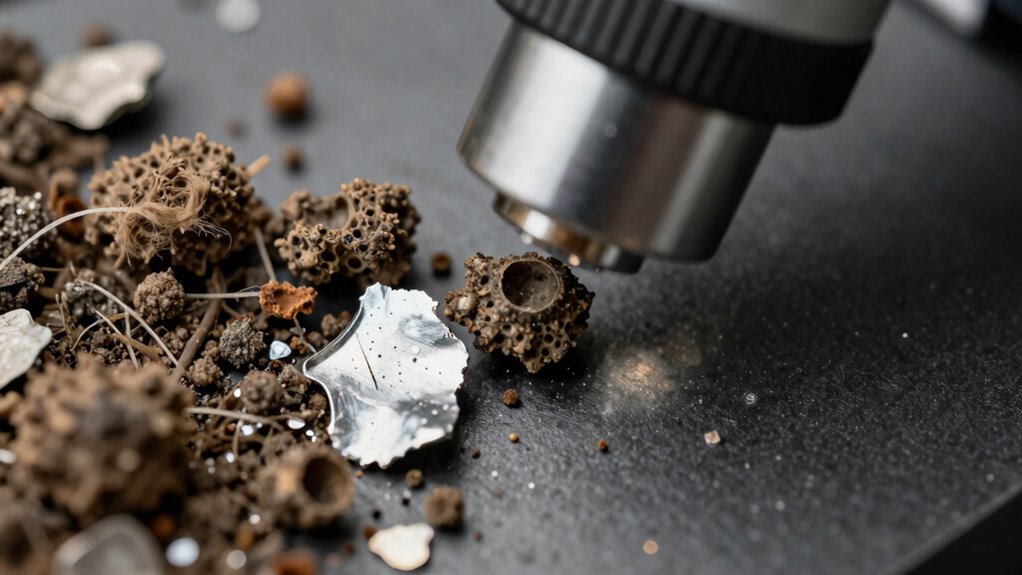
Microscopic Features That Separate Dirt and Metal Particles
When examining wear debris under a microscope, you’ll notice differences in morphology and shape that help distinguish dirt from metal particles. Metal debris often appears as irregular or elongated fragments with sharp edges, while dirt tends to look more rounded or granular. Pay close attention to surface texture details, as metal particles usually have smoother or more reflective surfaces compared to the rough or dull appearance of dirt. Recognizing wear debris morphology can also aid in understanding the sources of contamination and wear mechanisms in machinery. Additionally, the properties of electric bikes can influence the nature of wear debris generated in different applications. Being familiar with material characteristics can further improve the accuracy of identification. Understanding contamination sources is essential for diagnosing wear issues and implementing effective maintenance strategies.
Morphology and Shape
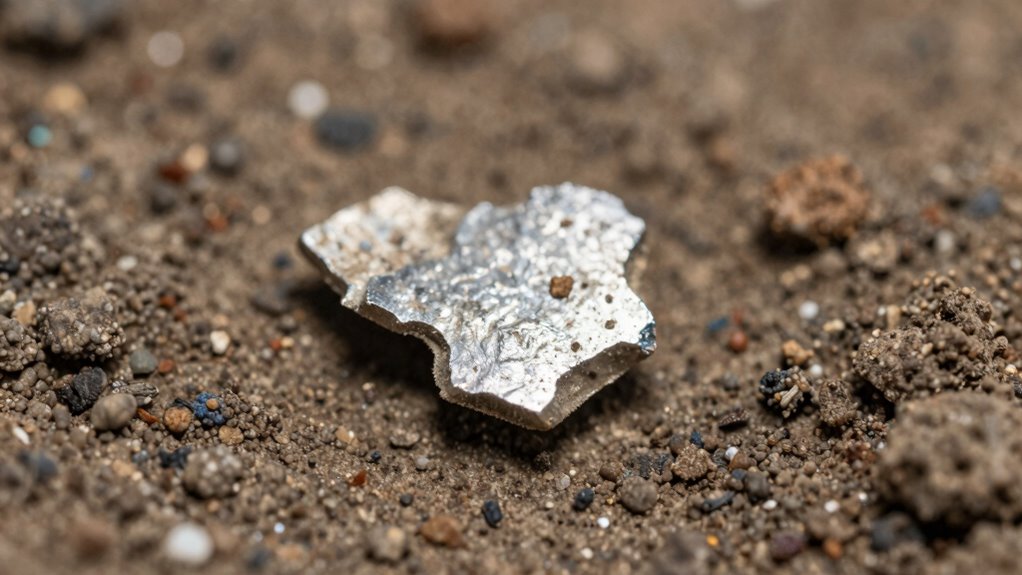
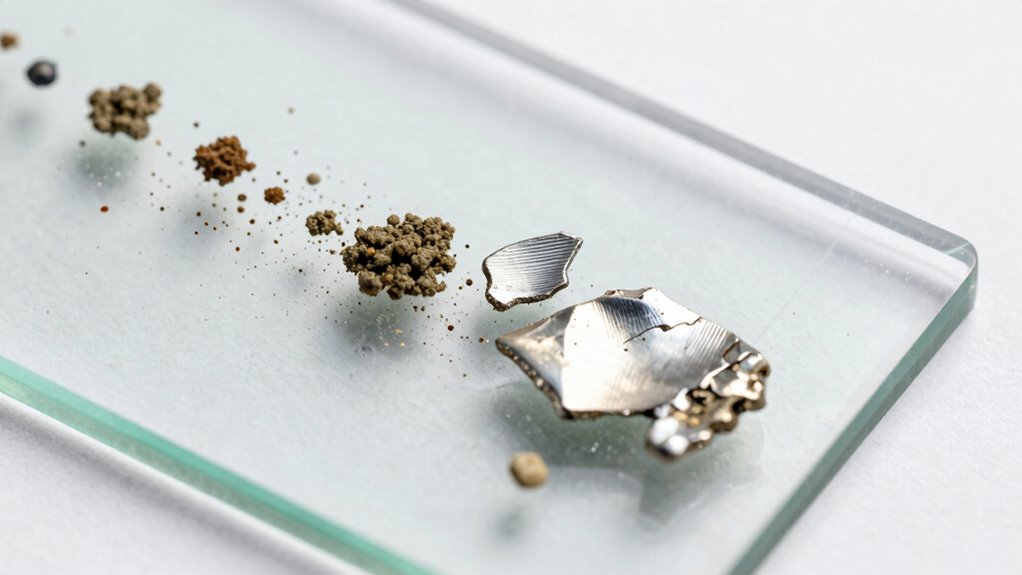
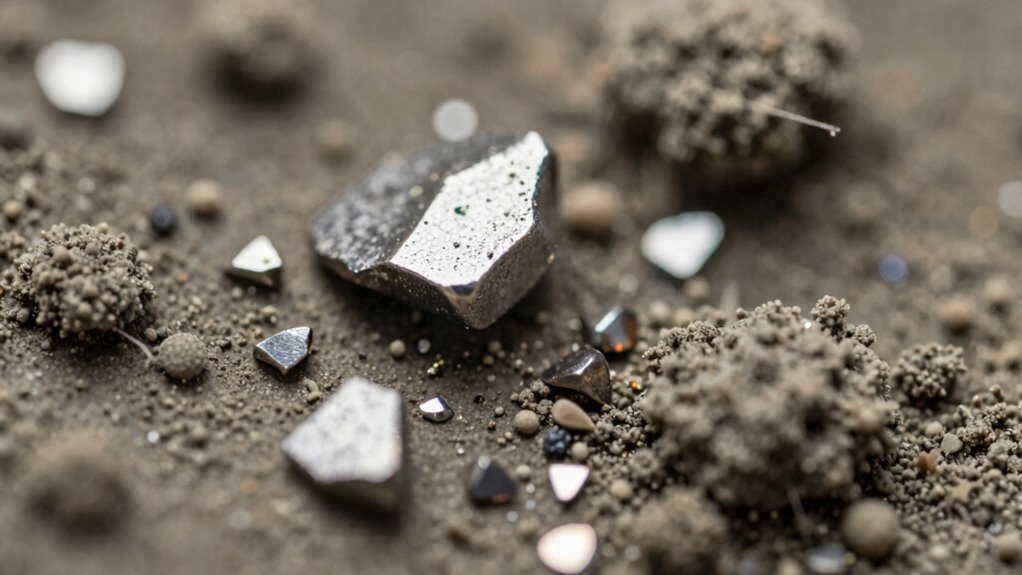
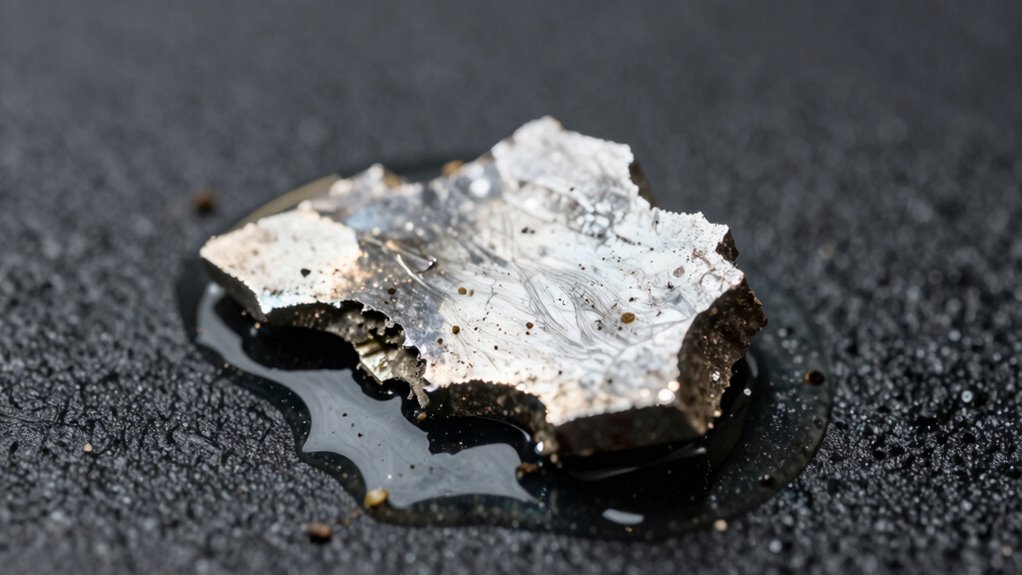
Morphology and shape are key microscopic features that help distinguish dirt particles from metal debris in wear analysis. You’ll notice dirt particles often have irregular, amorphous shapes with random particle orientation, reflecting their natural, unprocessed origin. Metal debris, on the other hand, tends to display more defined, angular, or elongated forms resulting from mechanical wear or fracture. Debris color also provides clues: dirt particles usually appear dull, earthy, or dark, while metal fragments often exhibit shiny, metallic luster. The combination of particle shape, orientation, and color allows you to quickly differentiate between contamination and wear-related debris. Recognizing these morphological cues helps you make accurate, rapid assessments during microscopic inspection. Understanding particle morphology is essential for accurate wear analysis and material assessment. Additionally, particle shape and form can reveal insights into the specific wear mechanisms involved, aiding in more precise diagnostics.
Surface Texture Details
Surface texture details provide another layer of distinction between dirt particles and metal debris under a microscope. Metal particles often display smooth, shiny, or crystalline surfaces due to their manufacturing processes, while dirt particles tend to have irregular, rough, or porous textures caused by contamination sources. Examining surface textures helps identify particle adhesion patterns; dirt may cling loosely with porous surfaces, whereas metal debris shows stronger adhesion with smooth, compact surfaces. Recognizing these details prevents misidentification and improves analysis accuracy. Here’s a quick comparison:
| Feature | Dirt Particles | Metal Debris |
|---|---|---|
| Surface Texture | Rough, porous, irregular | Smooth, shiny, crystalline |
| Adhesion Pattern | Loose, weak particle adhesion | Strong, firm particle adhesion |
| Contamination Source | Environmental, organic, dust | Wear, corrosion, manufacturing |
Understanding the surface characteristics can also provide clues about the contamination source involved, especially when combined with knowledge of metal properties. Recognizing surface texture details is essential for accurate analysis and preventing misclassification of particles. For example, microscopic evaluation can reveal subtle differences in particle origins that are not visible to the naked eye.

LockNLube Grease Gun Coupler locks onto Zerk fittings. Grease goes in, not on the machine. World's best-selling original locking grease coupler. Rated 10,000 PSI. Long-lasting rebuildable tool.
LOCKS ON, STAYS ON, WON'T LEAK—LIKE HAVING AN EXTRA HAND! No need to hold the coupler in place...
As an affiliate, we earn on qualifying purchases.
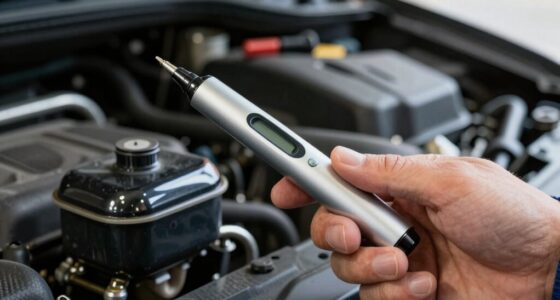
Magnification and Lighting Tips for Fast Debris Identification

To identify debris quickly, you need to set your magnification correctly—usually between 200x and 500x for clear detail. Using proper lighting, like oblique or diffuse illumination, helps highlight surface features and distinguish particles. Mastering these techniques allows you to analyze debris efficiently and accurately. Incorporating knowledge of arcade game history can also help you recognize certain debris types based on surface markings and textures. Additionally, understanding the types of debris commonly encountered can further streamline identification efforts. Being familiar with sound healing science can provide insights into vibrational patterns that may be present in certain metallic or organic particles, aiding in differentiation. Recognizing surface textures under magnification can also assist in differentiating debris sources based on their formation processes.
Optimal Magnification Settings
Choosing the right magnification is essential for quickly and accurately identifying debris under a microscope. Typically, start with a lower magnification, around 50x to 100x, to get an overview of the debris’s shape and distribution. If you suspect metal particles, increase to 200x or higher to examine surface details, which help determine chemical composition. Particle density influences your choice; dense debris may require slightly lower magnification to avoid losing detail, while sparse debris benefits from higher magnification for clarity. Adjusting magnification appropriately allows you to distinguish dirt from metal efficiently without missing critical features. Proper lighting conditions improve contrast and visibility, making it easier to differentiate between various debris types. Using the correct illumination technique can significantly enhance the clarity of surface features, aiding in faster identification. Additionally, understanding debris morphology helps identify the source and nature of the particles more accurately. Being familiar with common metal particle characteristics can further streamline the identification process.
Effective Lighting Techniques
Have you ever struggled to see debris clearly under a microscope? Effective lighting makes all the difference. Use angled illumination to enhance shadow contrast, which helps distinguish debris shapes and textures quickly. Adjust the light intensity to maximize color contrast; brighter lighting reveals color differences between dirt and metal debris. Incorporate a ring light or fiber optic illuminator for even, controlled lighting, reducing glare and shadows that obscure details. Experiment with side lighting to create shadow enhancement, making debris features stand out sharply. Proper lighting not only clarifies debris morphology but also speeds up identification, saving you time. Additionally, understanding the composition of debris can guide you in choosing the appropriate lighting techniques. Using a light meter can help you precisely control illumination levels for optimal visibility. Employing proper illumination angles is crucial in revealing surface features and distinguishing debris types more effectively. By fine-tuning your illumination angles and intensity, you’ll improve debris visibility and differentiate materials faster and more accurately.

KRETLAW Grease Gun, 7000 PSI Heavy Duty Professional Pistol Grip Grease Gun Kit 14 OZ with Coupler, Double Grease Injector Needles, 18" & 2pc 12" Flex Hoses and Reinforced Glove
MORE IN YOUR GREASE GUN KIT: Comprising 1 heavy-duty grease gun, complemented by 1 premium 6-jaw coupler upgrade,...
As an affiliate, we earn on qualifying purchases.
Signs of Metal Debris in Lubricants and Filters
Metal debris in lubricants and filters often signals internal wear or imminent component failure. You should watch for increased lubricant contamination, which can appear as dark, gritty particles or shiny metal flakes. Regular filter maintenance helps capture these debris types before they circulate through your system, but sudden changes in debris size or quantity indicate trouble. If you notice fine metallic dust or larger metal fragments in the filter or oil sample, it’s a clear sign that parts are wearing down. Consistent inspection of filters and lubricant samples allows you to catch these warning signs early. Prompt action can prevent costly repairs, so stay vigilant for metal debris that signals internal damage. Proper filter maintenance and monitoring are key to keeping your machinery running smoothly.
Expert or Field? When to Rely on Professional Analysis
While inspecting lubricant samples and filters can catch many issues early, there are times when you need expert analysis to accurately diagnose metal debris problems. If the debris’s material composition isn’t clear or if contamination sources are uncertain, professional testing becomes essential. Experts use advanced techniques to identify whether debris originates from normal wear or foreign contamination, providing a detailed understanding of the material composition. This helps determine if the debris signals an imminent failure or simple dirt intrusion. When issues involve complex alloys, unknown contaminants, or subtle wear patterns, relying on specialists ensures accurate diagnosis. In these cases, their insights prevent unnecessary repairs and guide effective maintenance, saving you time and money in the long run.
Top Tips for Accurate Debris Classification in the Field
Accurately classifying debris in the field requires careful observation and systematic approach. Begin by examining particle color; metal debris often appears shiny or metallic, while dirt or dirt-embedded particles tend to be dull or earthy. Next, consider chemical composition clues—if you can, perform quick tests like acid spots for certain metals or note reactions. Always compare the debris’s color and texture with known standards. Use a magnifying lens or portable microscope to distinguish fine details. Keep detailed notes of your observations, including particle size, shape, and color variations. Remember, consistent documentation helps verify results. By focusing on chemical composition indicators and particle color, you’ll improve classification accuracy, saving time and avoiding misinterpretation in the field.
Frequently Asked Questions
What Types of Equipment Are Most Prone to Metal Debris Contamination?
You’ll find that gearboxes, engines, and hydraulic systems are most prone to metal debris contamination. These equipment types experience high wear patterns, making them susceptible to lubricant contamination from metal particles. Regularly inspecting wear debris under a microscope helps you identify early signs of damage, allowing you to prevent costly failures. Monitoring this debris guarantees you catch issues before they escalate, keeping your equipment running smoothly and efficiently.
How Can Surface Contamination Affect Debris Analysis Results?
Surface contamination can skew your debris analysis results by introducing extraneous particles, making it harder to distinguish between genuine wear debris and dirt. Lubricant contamination often carries debris that interferes with accurate identification, leading to false conclusions. This wear particle interference can mask real issues or suggest problems where none exist. To guarantee precise analysis, you need to clean surfaces thoroughly and use proper techniques to minimize contamination, ensuring reliable and accurate results.
Are There Specific Environmental Conditions That Influence Debris Appearance?
Environmental factors like temperature, humidity, and contamination levels markedly influence debris appearance. These conditions alter debris morphology, making particles appear more oxidized, warped, or contaminated. For example, high humidity can cause corrosion, changing metal debris shape, while dust and dirt can obscure true debris characteristics. By understanding how environmental factors impact debris morphology, you can more accurately distinguish dirt from metal under a microscope, improving your analysis precision.
What Safety Precautions Should Be Taken During Microscopic Examination?
You should wear personal protective equipment, like gloves and safety glasses, to safeguard yourself from potential hazards. Follow strict sample handling procedures to prevent contamination or accidental exposure. Always work in a well-ventilated area and use appropriate tools to handle samples carefully. Keep your workspace clean and dispose of debris properly. These precautions ensure your safety while examining wear debris under a microscope.
How Often Should Debris Analysis Be Performed for Optimal Maintenance?
You should perform debris analysis at least every 3,000 to 5,000 miles or during scheduled lubrication intervals. This frequency guarantees you catch wear debris early, preventing catastrophic failures. Regular debris monitoring intervals help optimize your maintenance, saving time and money. Don’t wait for disaster—stay ahead by analyzing debris frequently, and you’ll keep equipment running smoothly, extending its lifespan and avoiding costly downtime.
Conclusion
By mastering quick identification techniques, you can spot metal debris in lubricants or filters in seconds. Did you know that over 60% of machinery failures are linked to debris contamination? Using proper magnification, lighting, and microscopic features, you can prevent costly breakdowns. Trust your eyes, but don’t hesitate to seek professional analysis when uncertain. Staying sharp with debris classification helps keep equipment running smoothly and saves you time and money in the long run.