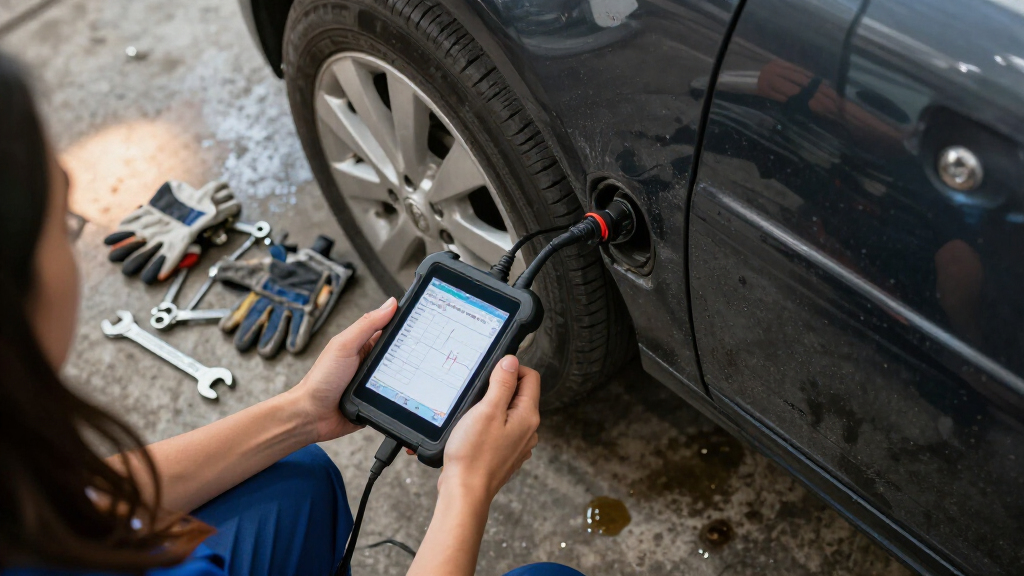

This guide walks you through using a car diagnostic scan tool (also called an OBD2 scanner or code reader) to find out why your check engine light is on, understand what the stored trouble codes mean, and clear those codes once the underlying problem is fixed. It is written for beginners and DIY owners who have never plugged a scanner into a car before, and it works for any passenger vehicle sold in the US from 1996 onward, and most cars worldwide from 2001 (petrol) or 2004 (diesel) onward. You do not need mechanical training to complete this task. By the end, you will have a printed or photographed list of diagnostic trouble codes (DTCs), a plain-language understanding of what they mean, and a decision about whether to repair the issue yourself or take the car to a shop with concrete information in hand. Expect the whole process to take 20-40 minutes, most of which is note-taking and research rather than scanning.

Get business pricing on garage and car supplies
- Business-only prices and quantity discounts
- Tax-exempt purchasing
- Multiple users, one account, clear invoices
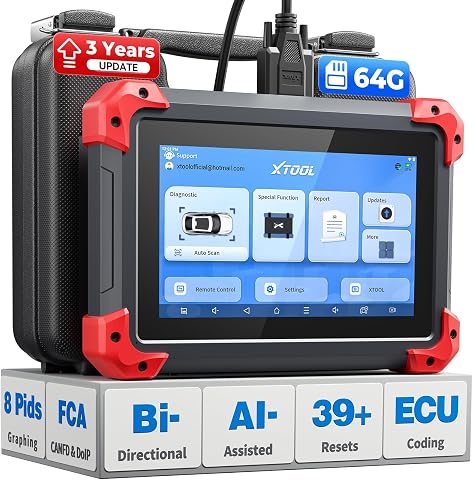
XTOOL D7 Bidirectional OBD2 Scan Tool with ECU Coding and 39+ Reset Functions
- ✔ Storage: 64GB
- ✔ Battery: 5000mAh; 2500mAh 7.3V fast-charging
- ✔ Special functions: 39+
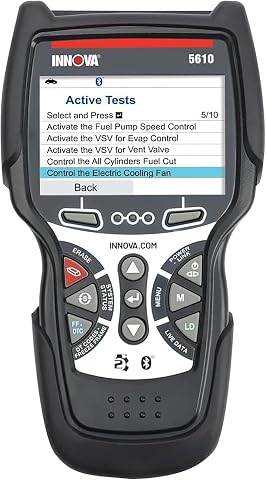
Innova 5610 OBD2 Bidirectional Scan Tool
- ✔ Brand: Innova
- ✔ Model: 5610
- ✔ Vehicle compatibility: Most 1996–2023 OBD2 vehicles; coverage varies

THINKCAR ThinkScan Plus S7 OBD2 Diagnostic Scanner
- ✔ Display: 5-inch touchscreen
- ✔ Operating system: Android 6.0
- ✔ Processor: Quad-core 1.3 GHz
Difficulty: Beginner | Time: 20-40 minutes
What You’ll Need
Tools & Materials:
- An OBD2 scan tool (basic code reader, handheld scanner, or Bluetooth adapter with a smartphone app)
- Your vehicle, parked within reach of where you will sit with the scanner
- A phone or camera to photograph the codes and freeze-frame data
- Pen and paper or a notes app
- Vehicle owner’s manual (to locate the OBD port if it is not immediately visible)
Knowledge:
- Ability to locate your car’s fuse panel area and driver’s-side dashboard
- Comfort turning the ignition to the ‘on’ position without starting the engine
- Basic ability to search and cross-reference code definitions online
If you are buying a scanner for this task, a basic code reader ($20-$50) reads and clears codes and is enough for most owners. Mid-range handheld scanners ($60-$200) add live data and freeze-frame information. Bluetooth adapters ($15-$40) paired with a smartphone app offer the most detail per dollar but require downloading an app such as Torque, Car Scanner, or BlueDriver before you start. Do this download and pairing at home, indoors, before you go out to the car.
XTOOL D7 Bidirectional OBD2 Scan Tool with ECU Coding and 39+ Reset Functions
The XTOOL D7 earns our top spot because it is the only tool in this lineup that professionals and serious DIYers won’t outgrow. Its headline advantage is ECU coding, which neither the Innova 5610 nor the ThinkScan Plus S7 offers. That capability matters if you ever need to program replacement modules, code injectors, or adapt components after repair — tasks that would otherwise require a trip to the dealership. Combined with support for FCA, CAN FD, and DoIP protocols, the D7 is simply better prepared for modern vehicles than the other two picks.In daily use, the D7’s strengths translate into breadth. There are more than 4,000 active tests available through its bidirectional controls, letting you actuate components to verify whether a part or its wiring is at fault — a diagnostic step the ThinkScan Plus S7 can’t match at the same scale. Live data graphing on up to 8 PIDs simultaneously helps you spot intermittent sensor problems that a single scrolling readout would miss. The 64GB of storage and 5000mAh battery mean it functions as a standalone tablet rather than something tethered to a laptop.Compared with the Innova 5610, the tradeoff is complexity and cost of ownership. The D7’s three years of free updates is generous, but eventually expires, whereas the Innova’s updates never carry a fee. The Android-based interface also has a steeper learning curve than the Innova’s straightforward handheld menus. Coverage is broad — over 100,000 vehicle models — but Indian-market vehicles are excluded, and some advanced functions still require verifying compatibility with your specific car. For buyers who want maximum diagnostic capability in a single purchase, though, this model makes the most sense.
Pros:
- ECU coding capability that the other picks lack
- Over 4,000 active tests and 39+ reset functions
- Supports FCA, CAN FD, and DoIP protocols for newer vehicles
- Three years of free software updates
Cons:
- Free updates expire after three years
- Tablet interface has a steeper learning curve than handheld tools
- Excludes Indian vehicle models and some functions need compatibility checks
Best for: Professional mechanics and advanced DIYers who need ECU coding, deep bidirectional testing, and broad modern-vehicle coverage
Not ideal for: Casual owners who just want to read and clear a check engine light, or anyone unwilling to learn a tablet-style interface
Bottom line: The most capable tool in this roundup, and the one to buy if diagnostics is a regular part of your work rather than an occasional task.
“The most capable tool in this roundup, and the one to buy if diagnostics is a regular part of your work rather than an occasional task.”
Innova 5610 OBD2 Bidirectional Scan Tool
The Innova 5610 takes a different philosophy from the two touchscreen tablets in this comparison: it’s a traditional handheld tool you can pick up and use within minutes of opening the box. For home mechanics, that immediacy is genuinely valuable. This option stands out for covering engine, transmission, ABS, and SRS systems in a device with no menus to learn, no Android OS to navigate, and no battery to manage separately.Its bidirectional controls let you run commands and selected reset or relearn procedures, which puts it well ahead of basic code readers and keeps it competitive with the ThinkScan Plus S7’s feature set. Where the XTOOL D7 pulls ahead is in depth — the D7 offers ECU coding and a far larger library of active tests — but the Innova counters with two things its rivals can’t match. First, free updates with no subscription fees ever, which makes it the cheapest of the three to own long-term once the D7’s three-year update window closes. Second, ASE-certified support and integration with the RepairSolutions2 app, which helps translate a trouble code into a likely fix rather than leaving you to search forums.The drawbacks are real, though. Vehicle coverage spans most 1996–2023 OBD2 vehicles, but features genuinely vary by make, model, and year — some advanced functions are limited to select vehicles, and there’s no CAN FD or DoIP support for the newest platforms. The single-language-per-unit setup (English, Spanish, or French) also means the display won’t switch on the fly. Still, compared with similar options, this model is better suited to someone who values a dependable, no-nonsense tool over a do-everything tablet.
Pros:
- Free lifetime updates with no subscription fees
- Reads engine, transmission, ABS, and SRS live data
- Bidirectional controls for testing selected vehicle functions
- ASE-certified support and RepairSolutions2 app integration
Cons:
- Features vary significantly by make, model, and year
- No CAN FD or DoIP protocol support for newer vehicles
- Advanced functions limited to select vehicles
Best for: Home mechanics and DIYers who want bidirectional testing and multi-system coverage in a simple handheld with no subscription costs
Not ideal for: Owners of the newest vehicles needing CAN FD/DoIP support, or anyone requiring ECU coding
Bottom line: The most user-friendly and cheapest-to-own pick here, ideal if you want capable diagnostics without a tablet interface or update bills.
“The most user-friendly and cheapest-to-own pick here, ideal if you want capable diagnostics without a tablet interface or update bills.”
THINKCAR ThinkScan Plus S7 OBD2 Diagnostic Scanner
The ThinkScan Plus S7 occupies the entry point of this comparison, offering a 5-inch Android touchscreen experience for buyers who want more than a handheld code reader but don’t need the XTOOL D7’s professional-grade depth. Its core strength is seven-system coverage — engine, ABS, SRS, transmission, body control, air conditioning, and dashboard — across 94 car brands, which is remarkably broad coverage for its tier.Where this model distinguishes itself from the Innova 5610 is in data presentation: it can stream up to 120 live data channels on a touchscreen with fault-code lookup built in, and its 32GB of expandable storage plus wireless updates give it a more modern feel than Innova’s handheld format. The quad-core processor is modest by tablet standards and the aging Android 6.0 base shows in responsiveness, but it’s adequate for diagnostic work.The catch — and it’s a significant one — is the reset menu. The S7 advertises 28 maintenance services, but you can only select five. That forces a real decision: if you service your own vehicles, you might choose oil reset, brake bleed, TPMS relearn, battery registration, and throttle relearn, but you’ll be locked out of the rest. Compare that with the XTOOL D7’s 39+ functions all included, and the value equation shifts depending on how many services you actually need. For a buyer whose maintenance needs are narrow and predictable, this pick makes the most sense; for anyone wanting flexibility later, the restriction will chafe.
Pros:
- Seven-system diagnostics across 94 car brands
- Up to 120 live data streams with graphing
- Wireless software updates and expandable storage
- Touchscreen interface at an accessible price point
Cons:
- Only five of 28 maintenance services can be selected
- Older Android 6.0 OS with a modest 1.3 GHz processor
- No bidirectional depth comparable to the XTOOL D7
Best for: Budget-conscious DIYers with predictable maintenance needs who want touchscreen diagnostics across many vehicle brands
Not ideal for: Buyers who want access to the full reset function library without pre-committing to five services
Bottom line: A smart entry-level touchscreen scanner if your five chosen reset functions match your actual maintenance routine — restrictive otherwise.
“A smart entry-level touchscreen scanner if your five chosen reset functions match your actual maintenance routine — restrictive otherwise.”
As an Amazon Associate we earn from qualifying purchases.
Before You Start
Safety and setup: Park the car on level ground, set the parking brake, and turn the engine off before connecting anything. Never connect or disconnect a scan tool while the engine is running. Do not clear codes before you have written them down and captured freeze-frame data — once cleared, that evidence is gone and a shop cannot use it to diagnose intermittent problems. Also know that clearing codes resets your car’s emissions readiness monitors, which means you will fail an emissions/inspection test if you present the car before the monitors complete their drive cycles (this can take several days to a week of normal driving).
Confirm your car has an OBD2 port: look for a roughly 2-inch trapezoidal connector under the dashboard on the driver’s side, usually within 2 feet of the steering wheel, sometimes behind a plastic cover or near the fuse box. If you cannot find it, check the owner’s manual under ‘OBD’ or ‘diagnostic connector’.
Step-by-Step Instructions
Step 1: Turn the ignition off and locate the OBD2 port
Turn the engine off and remove the key from the ignition. Kneel or crouch by the driver’s-side footwell and look under the dash for the 16-pin trapezoidal OBD2 connector. Check the area below and left of the steering column, behind any small plastic access panel, and near the hood release lever or fuse box cover.
Tip: The port is always within reach of the driver’s seat — never in the engine bay or passenger side. A phone flashlight held at floor level makes it much easier to spot.
Check: You can see and touch a 16-pin connector shaped like a wide, flat trapezoid with two rows of pins.
Step 2: Plug the scan tool into the port
Align the scanner’s connector with the port’s trapezoidal shape — it only fits one way — and push it in firmly until it seats. For Bluetooth adapters, push the adapter in until it is fully seated and its LED (if present) begins blinking. Press the power button now if your scanner has one; most power on automatically once connected.
Tip: Never force the connector. If it resists, rotate it 180 degrees — the pin-1 side must match.
Check: The scanner screen lights up and shows a menu, or the Bluetooth adapter’s LED blinks steadily.
Step 3: Turn the ignition to ‘on’ without starting the engine
Insert the key and turn it two clicks to the ‘run/on’ position — the dashboard lights up but the engine does not crank. For push-button starts, press the start button twice without touching the brake pedal. Wait about 10-15 seconds for the car’s computers to fully wake up before proceeding.
Tip: The dash warning lights should all be illuminated in this position, including the check engine light if there are stored codes. This confirms power to the diagnostic system.
Check: Dashboard is lit, engine is silent, and the scanner shows it is communicating or ready to scan.
Step 4: Run the scan and read stored codes
Select ‘Read Codes’, ‘Diagnostic’, or ‘Scan’ from your scanner’s menu (labeling varies by brand). Wait for the tool to communicate with the vehicle for 10-60 seconds, then read the displayed codes. Expect most to be in the format of one letter followed by four digits, such as P0301 or P0420. Photograph the screen showing every code before you do anything else.
Tip: If your scanner shows ‘pending codes’ as a separate menu, read those too — pending codes indicate problems the computer has detected once but not yet confirmed.
Check: You have a photo or written list of every code displayed, or confirmation that no codes are stored.
Step 5: Capture freeze-frame and live data if available
Select the freeze-frame option for each code if your scanner offers it, and photograph the screen. Freeze-frame records engine speed, coolant temperature, load, and vehicle speed at the exact moment the fault was detected — extremely useful for intermittent problems. Open the live data screen if you have a mid-range scanner or app, and note any readings flagged as out of range.
Tip: Freeze-frame data is lost when codes are cleared. Capture it now or lose it permanently.
Check: You have photographed the freeze-frame screen or confirmed your basic reader does not offer this feature.
Step 6: Look up what each code means
Search each code in the format ‘[your code] [your make and model]’, for example ‘P0171 Toyota Corolla’. Codes are standardized, but the most common cause for a given code varies by manufacturer, so adding your vehicle to the search produces far better results. Cross-reference at least two sources and write the two or three most likely causes for each code alongside the code itself.
Tip: Ignore any site or video that promises a code has one single cause. A code points to a symptom (e.g., ‘system too lean’), not to a specific failed part.
Check: Each code on your list has a plain-language description and a short list of likely causes written next to it.
Step 7: Decide: repair, monitor, or take it to a shop
Sort your codes into three groups: (1) things you can handle yourself, such as a loose fuel cap (P0440-series EVAP codes) or a dirty mass airflow sensor; (2) problems needing diagnosis with tools you do not have, such as misfires or lean conditions that require testing sensors; and (3) urgent issues, such as catalyst or overheating-related codes. Repair everything in group 1 now, before clearing anything.
Tip: A flashing check engine light means an active misfire that can destroy the catalytic converter — stop driving and address it immediately. A steady light allows cautious driving.
Check: You have a plan for each code: fixed, scheduled for repair, or queued for a shop visit with your code list in hand.
Step 8: Clear the codes only after the repair
Complete the repair first, then reconnect the scanner and turn the ignition to ‘on’. Select ‘Erase Codes’ or ‘Clear Codes’ from the menu and confirm when prompted. Watch the check engine light turn off within a few seconds as the scanner wipes the stored codes.
Tip: Clearing codes does not fix anything — it resets the scoreboard. If the underlying fault remains, the light will return, sometimes within minutes, sometimes after days of driving.
Check: The check engine light goes out and the scanner reports zero stored codes.
Step 9: Unplug the scanner and verify the repair stuck
Disconnect the scan tool from the OBD2 port. Start the engine normally and drive the car through normal use for several days. Re-scan at the end of the week: if the same code returns, the repair did not address the root cause and further diagnosis is needed.
Tip: Store the scanner in the glovebox — periodic scans are the cheapest early-warning system your car can have.
Check: After a week of driving, a fresh scan shows no codes and the check engine light stays off.
Common Mistakes to Avoid
- Clearing codes before recording them — Photograph every code and freeze-frame screen immediately after the scan, before touching the erase function. Cleared data cannot be recovered.
- Replacing parts based solely on the code name — Treat a code as a symptom, not a diagnosis. An oxygen sensor code often means a vacuum leak or fuel problem rather than a bad sensor. Research the code for your specific make and model and test before buying parts.
- Clearing codes right before an emissions or inspection test — Clearing resets readiness monitors, which automatically fail most emissions tests. Wait a week of normal driving for monitors to reset, or verify readiness status on your scanner before booking the test.
- Forcing the scanner connector or plugging it in upside down — Match the trapezoid shape before pushing. The connector fits only one way; forcing it bends pins and can require a costly port replacement.
Troubleshooting
Problem: Scanner will not power on when plugged in
Solution: Confirm the ignition is in the ‘on’ position — some cars cut power to the port when off. Check the vehicle’s fuse for the OBD/diagnostic port (usually listed in the owner’s manual) and replace it if blown. Try wiggling the connector to check for a loose port.
Problem: Scanner reports ‘link error’ or cannot communicate with the vehicle
Solution: Turn the ignition fully to ‘on’ (dash lit, engine off), unplug and firmly reseat the connector, and retry. If using a Bluetooth adapter, confirm the phone is paired to the adapter, not the car’s infotainment system, and that the app’s correct adapter is selected in settings.
Problem: Bluetooth adapter pairs but the app shows no data
Solution: In your phone’s Bluetooth settings, confirm the adapter shows as ‘connected’. In the app, select the adapter by name in the connection/adapter settings menu. Also verify the ignition is on — most adapters stop transmitting when power is cut.
Problem: Check engine light returns days after clearing
Solution: This means the fault is still present. Re-scan, compare the returned codes with your original list, and proceed to deeper diagnosis or a shop visit with both code sets in hand — the pattern of which codes return quickly is itself diagnostic information.
What Success Looks Like
You have completed this task when: (1) you connected a scan tool and successfully read all stored codes without errors; (2) you photographed or wrote down every code plus any freeze-frame data; (3) you researched and documented what each code means for your specific vehicle; (4) you repaired the underlying cause (or scheduled the repair); and (5) after clearing, the check engine light stays off through at least a week of normal driving, confirmed by a final clean scan. If the light remains off and a re-scan shows zero stored codes after several days of driving, the repair is verified successful.
Next Steps
Keep your code list with the vehicle’s service records — recurring codes over time reveal patterns shops will find useful. Re-scan the car every month or two as preventive maintenance; codes can be stored even before the check engine light illuminates. If the same code returns after a confirmed repair, move to component testing (multimeter checks on sensors and wiring) or take the car to a shop, bringing your scanner’s code list and freeze-frame photos. If you want to go further, learn to read live data streams — watching oxygen sensor voltages or fuel trims in real time turns a code reader into a genuine diagnostic tool.
Frequently Asked Questions
Will using a scan tool damage my car?
No. The OBD2 port is designed for exactly this purpose, and consumer scan tools only read data and clear codes. The only risks come from forcing the connector (which can bend pins) or clearing codes carelessly and losing diagnostic data. Connecting and disconnecting with the ignition off eliminates essentially all risk.
Why did my check engine light come back after I cleared the code?
Clearing a code only erases the computer’s memory of the fault — it does not fix the cause. If the problem still exists, the computer re-detects it and re-illuminates the light, sometimes within one drive cycle and sometimes after several days. The code returning confirms the repair did not address the root cause.
Do I need an expensive scanner, or is a cheap code reader enough?
A basic $20-$50 code reader is sufficient for most owners — it reads and clears codes, which covers the majority of DIY use. Pay more for live data, freeze-frame, and manufacturer-specific codes if you plan to diagnose rather than just identify problems. A Bluetooth adapter plus a good app is the best value for detailed data.
What is the difference between stored, pending, and permanent codes?
Stored (confirmed) codes are faults detected repeatedly enough to turn on the check engine light. Pending codes have been detected once and are awaiting confirmation. Permanent codes are set by emissions regulations and cannot be cleared by any scan tool — they clear themselves only after the car verifies the fix through completed drive cycles.
Can I drive with the check engine light on?
A steady light usually permits cautious driving while you arrange diagnosis. A flashing light signals an active misfire that can overheat and destroy the catalytic converter — reduce power, avoid highway driving, and address it immediately. When in doubt, scan it: a five-minute read tells you whether the issue is a loose fuel cap or something urgent.
Fall Picks
fall essentials
As an affiliate, we earn on qualifying purchases.