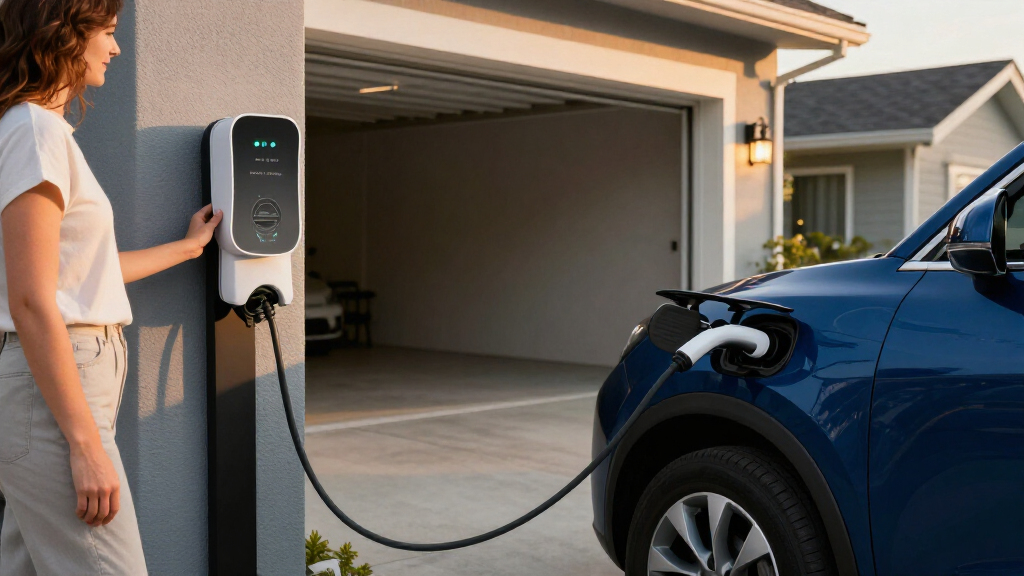
This checklist is for EV owners setting up a home charging area and organizing the equipment around it. It covers a Level 2 charging station, an extension cable, cable management, outdoor outlet protection, a weatherproof cover, and energy monitoring.

Get business pricing on garage and car supplies
- Business-only prices and quantity discounts
- Tax-exempt purchasing
- Multiple users, one account, clear invoices
The sections follow the setup from charging equipment to supporting accessories and monitoring. Product picks appear where provided; the cable hook, GFCI outlet, and weatherproof cover sections offer selection guidance without naming a product.
Use each section to compare the listed pick or checklist points with your vehicle, charging location, and electrical setup. Check connector compatibility, cable reach, and installation requirements before buying, and have electrical work evaluated by a qualified professional.
Level 2 Charging Station
A Level 2 charging station is the core of a home charging setup, so start by confirming the unit’s connector and the electrical requirements for the location. The listed pick is the Emporia Pro Level 2 EV Charger with PowerSmart, 48 A, J1772 Connector. Its J1772 connector is a key detail to compare with your vehicle’s charging port and any adapter arrangement you use.
A common mistake is treating the listed amperage as proof that the charger will work with any home circuit. Confirm the circuit, wiring, and installation requirements for the charger with a qualified electrician, and make sure the planned installation location supports the intended setup. Also check whether the cable can comfortably reach the vehicle’s charge port when parked in your usual position.
Measure the route from the proposed mounting point to the vehicle rather than relying on a rough estimate. Consider where the cable will rest between sessions and whether its path creates a trip or vehicle-contact concern. Before purchase, verify current product documentation for the exact model and installation requirements, and compare the connector details with your vehicle’s manual.
What to look for:
- Confirm the J1772 connector works with your vehicle or adapter setup.
- Check the electrical and circuit requirements with a qualified electrician.
- Measure the cable route from mounting location to charge port.
- Review the current installation instructions for the exact model.
- Choose a location with a practical cable path and storage plan.
Emporia Pro Level 2 EV Charger with PowerSmart, 48 A, J1772 Connector and 25-Foo

This 240 V home EV charger delivers up to 48 A and uses PowerSmart technology with the included Vue Home Energy Monitor to balance charging loads with household electricity use. It supports scheduled charging and real-time energy tracking through the Emporia app, and can be installed with a NEMA 14-50 plug or hardwired.
Pros:
- PowerSmart load balancing works with the existing electrical panel
- App supports charging schedules and real-time usage tracking
- Includes a home energy monitor and 25-foot charging cable
- Weather-resistant design and 3-year warranty
Cons:
- Requires a 240 V connection
- Installation may require an electrician
Best for: EV owners whose vehicle setup is compatible with a J1772 connector.
Not ideal for: Buyers who have not confirmed their vehicle connector or home electrical requirements.
Bottom line: Verify connector compatibility, circuit suitability, and cable reach before choosing this charger.
Heavy-Duty Extension Cord
An extension cable can help bridge a distance between charging equipment and a vehicle, but compatibility and intended use deserve careful checking. The listed pick is the VEVOR EV Charger Extension Cable, 48Amp, 21 ft, J1772 Extension Cord f. Compare its J1772 connector details with the charger and vehicle arrangement you plan to use, and confirm that the specific cable is intended for that setup.
A common buying mistake is assuming that a cable’s stated amperage and length alone establish compatibility. Review the manufacturer’s documentation for the exact model, including the connection ends and any use limitations. Do not choose a route that leaves the cable stretched across a walkway, pinched by a door, or exposed to vehicle traffic. Check that the added reach solves a measured parking layout problem rather than creating a new cable-management problem.
Measure the needed path with the vehicle parked in its normal position and allow for a natural cable route. Avoid tight bends and locations where the cable may be pulled or crushed. If the instructions do not clearly support your intended charging combination, ask the charger or cable manufacturer or a qualified electrician before using it.
What to look for:
- Verify both connector ends against your charger and vehicle setup.
- Check the exact model’s stated amperage and use instructions.
- Measure the real cable path with the vehicle parked.
- Plan to keep the cable clear of doors, wheels, and walkways.
- Ask a qualified professional if the intended combination is unclear.
VEVOR EV Charger Extension Cable, 48Amp, 21 ft, J1772 Extension Cord for Level 1
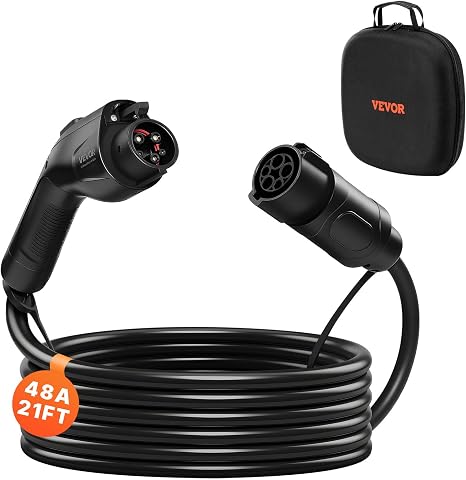
This heavy-duty 21-foot extension cable is compatible with 120V and 240V SAE J1772 electric vehicle chargers, allowing flexible charging from various angles and locations. Built with waterproof and fire-resistant materials, it is suitable for all weather conditions and includes accessories for easy storage and maintenance.
Pros:
- Flexible 21-foot length for easy charging at various angles
- Compatible with both Level 1 and Level 2 chargers
- Weatherproof and fire-resistant for safe outdoor use
- Includes carrying bag and accessories for convenience
Cons:
- Not UL listed
- No detailed warranty information provided
- Limited to 48 Amp charging capacity
Best for: Owners whose compatible charging setup needs additional reach.
Not ideal for: Setups where the cable would cross traffic or remain under strain.
Bottom line: Confirm the cable’s documented compatibility and plan a safe route before adding reach.
Cable Management Hook
A cable management hook gives the charging cable a consistent place to rest between sessions. Without a storage point, cable placement may become awkward, and the connector can be left where it may be stepped on or caught. Choose a hook that suits the cable’s size and the wall or post where you plan to mount it.
One common mistake is selecting a hook based on appearance without checking how the cable sits on it. Consider the cable’s weight and shape, the connector’s clearance, and whether the arrangement avoids sharp bends. The hook should keep the cable off the floor while allowing it to be removed and returned without pulling on the charger connection.
Plan the mounting position around your vehicle’s parked location and charge-port position. Check the surface and use mounting hardware appropriate to it; do not assume a hook or fastener is suitable for every wall. Keep the stored cable away from doors, walking paths, and areas where a vehicle could run over it. Leave enough slack for normal use, but avoid a loop that could snag.
What to look for:
- A shape and size that support the cable without sharp bends.
- A secure mounting method suited to the installation surface.
- Enough connector clearance for easy handling.
- A position that keeps the cable off the floor and out of walkways.
- A route that avoids vehicle tires, doors, and snag points.
Outdoor GFCI Outlet
For an outdoor charging area that uses an outlet, outlet protection and installation suitability are important parts of the setup. The right arrangement depends on the equipment, location, and applicable electrical requirements. Confirm whether the planned charger or outlet configuration calls for GFCI protection and what type is appropriate with a qualified electrician.
A common mistake is treating a weather-exposed outlet as ready for charging simply because it has a cover. The outlet, circuit, protective devices, and installation all need to be suitable for the intended equipment and location. Do not rely on a generic checklist to determine electrical code requirements or whether an existing outlet is appropriate.
Before selecting or installing anything, identify the charging equipment’s instructions and have the existing electrical setup assessed. Discuss outdoor exposure, outlet placement, circuit capacity, and the required protection with the electrician. Keep the outlet accessible without placing it where the charging cable will be pulled taut, stepped on, or pressed against a vehicle. Follow the equipment instructions and local requirements for the final installation.
What to look for:
- Ask an electrician what GFCI protection the setup requires.
- Confirm the outlet and circuit suit the intended charging equipment.
- Check installation requirements for the exact charger and outlet.
- Consider outdoor exposure and outlet placement.
- Keep the cable route accessible and free of strain.
Weatherproof Cover
A weatherproof cover can help protect an outdoor outlet when it is exposed to the elements, but its fit and intended use must match the outlet and installation. Check the cover’s documentation for the outlet configuration it accommodates and how it is meant to be used while equipment is connected.
A common mistake is assuming that any cover labeled for outdoor use will fit every outlet or provide the needed protection in every charging arrangement. Compare the cover dimensions and configuration with the outlet, plug, and cable. Consider whether the cover can close as intended with the equipment connected, and whether the cable exits without being pinched or sharply bent.
Review the outlet and charger instructions, then choose a cover suited to the location and actual plug arrangement. If the outlet is exposed to weather, ask a qualified electrician to confirm that the full installation is appropriate; a cover alone does not determine whether the outlet or circuit is suitable. Keep access clear and inspect the cover and cable placement as part of routine setup checks.
What to look for:
- A cover configuration that matches the installed outlet.
- Clearance for the plug and cable when connected.
- A cable exit that does not pinch or sharply bend the cable.
- Manufacturer instructions for use during charging.
- An installation location reviewed for outdoor suitability.
Smart Plug Monitor
Energy monitoring can help you review how household devices and charging-related use fit into your home’s broader electrical picture. The listed pick is the Emporia Whole-Home Energy Monitor with 16 Sensors and 4 Smart Plugs. Before selecting it, confirm what the monitor and included components are designed to measure and whether they fit your panel and intended monitoring plan.
A common mistake is assuming that a whole-home monitor automatically gives a direct measurement of a particular charging circuit or answers every energy question. Review the product documentation for sensor placement, supported connections, smart plug use, and any installation requirements. Check whether your intended loads can be monitored in the way you expect, and have panel work handled by a qualified professional when required.
Decide what information you want to track before installing the system: whole-home use, selected circuits, or devices connected through smart plugs. Confirm compatibility with your electrical panel and the devices you plan to monitor. Keep records of which sensors correspond to which circuits so readings remain understandable. Follow the manufacturer’s instructions and seek professional help if panel access or installation is outside your experience.
What to look for:
- Confirm panel compatibility and sensor installation requirements.
- Review what the 16 sensors and 4 smart plugs are intended to monitor.
- Check that the measurements match your tracking goals.
- Plan clear labels for sensors and monitored circuits.
- Use a qualified professional for panel work when needed.
Emporia Whole-Home Energy Monitor with 16 Sensors and 4 Smart Plugs

Monitor whole-home electricity use and up to 16 individual circuits with second-by-second energy tracking. The bundle includes four Wi-Fi smart plugs for remote control, scheduling, and outlet-level usage monitoring, with app support for iOS and Android and compatibility with Alexa and solar systems.
Pros:
- Tracks whole-home and individual circuit electricity usage
- Includes four smart plugs with remote control and scheduling
- Supports solar energy monitoring and net metering
- App provides usage trends, automations, and notifications
Cons:
- Cloud data storage is required for anytime app access
- Installation involves sensors for the electrical panel
Best for: Households that want to review home energy use across monitored points.
Not ideal for: Buyers expecting monitoring to answer questions the product documentation does not cover.
Bottom line: Match the monitor’s supported measurements and installation needs to your tracking goals.
Build the setup in a practical buying order: first confirm the charging station, vehicle connector, and electrical requirements; then measure whether an extension cable is needed. Next plan cable storage and confirm outdoor outlet protection and cover fit. Add energy monitoring once you know which household or charging-related information you want to track.
Take measurements, read the current instructions for each exact model, and get qualified help with electrical decisions. A few checks before buying can make the charging area easier to use and organize. Use this checklist as a starting point, and tailor the final setup to your vehicle, parking position, and home.