TL;DR
Automotive garage organization tools help you store equipment where you can find it, protect it, and use it safely. Start by measuring your space and sorting tools by how often you reach for them; then combine a rolling chest, wall storage, and labeled bins while keeping heavy items low and walkways clear.
Combine a rolling chest, visible wall storage, and labeled parts bins to suit different tools and tasks.
Measure wall, floor, bench, and drawer clearance before buying storage.
Keep heavy tools low and follow load ratings for shelves, panels, hooks, and cabinets.
Group sockets and fasteners by type or size, then label containers clearly.
Keep exits, vehicle paths, electrical panels, and fire-safety supplies accessible.

Get business pricing on garage and car supplies
- Business-only prices and quantity discounts
- Tax-exempt purchasing
- Multiple users, one account, clear invoices
Start with a simple mix of storage that fits your work
Automotive garage organization tools work best as a small system: a rolling chest for hand tools, wall storage for frequent-use items, and labeled bins or cabinets for parts and supplies. Each piece solves a different problem. Drawers protect tools from dust and group them for transport; wall storage makes often-used items visible; bins keep small parts from disappearing into a jumble. Combining them lets you keep the bench open without forcing every item into a single cabinet. For example, if you change your own tires and do basic maintenance, keep sockets and ratchets in the chest, hang the breaker bar on a wall hook, and put lug nuts or clips in labeled containers. A mobile cart can carry the tools and parts you need beside the car, then roll back out of the way when the job ends. The tradeoff is that rolling storage needs clear floor space and stable wheels; a fixed cabinet uses space more permanently but can hold supplies you rarely move. That flexibility matters in a one-car garage, where the work area often doubles as a parking spot. Before you buy, sort tools by type or task and note what you use most. Measure the open floor, wall, and bench space, and check that drawers can open fully when a car is parked nearby. These checks reveal whether a chest will actually reach the vehicle and whether doors or drawers will block a walkway. An organized workspace can reduce time spent searching, free up floor space, and make it easier to spot a tool left out after a job. Think of the layout as a map: the familiar route from chest to vehicle should stay clear.Products Worth Considering

Vantrue N4S 3-Channel Dash Cam with STARVIS 2 Night Vision

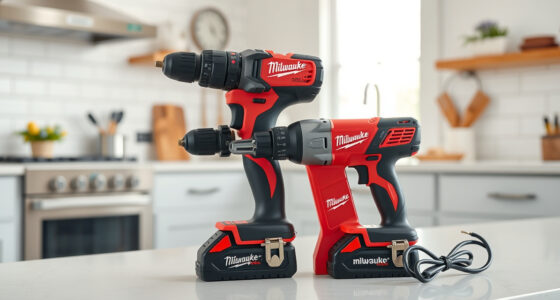
Milwaukee M12 FUEL 12V 1/4-Inch Hex Impact Driver Kit

Autel MaxiCharger AC Home Level 2 EV Charger, 50A, J1772, Wi-Fi, Hardwired, 25 ft
As an affiliate, we earn on qualifying purchases.
Choose a rolling chest for tools you carry from job to job
A rolling tool chest suits hand tools you want protected in drawers and close to the vehicle; fixed cabinets suit supplies you rarely move. Look at drawer slides, caster strength, locking options, and the chest’s loaded capacity before you buy. Drawer quality matters because sockets and ratchets can add substantial weight: slides that feel smooth empty may bind when loaded, turning frequent access into a chore. Casters and wheel locks affect both mobility and stability, while a lock can secure tools but adds little value if the chest is left open during a job. Imagine replacing brake pads in a driveway garage. You can roll a chest beside the front wheel and keep the ratchet, sockets, and pliers within reach, instead of making repeated trips across the room. That convenience saves steps, but the chest also occupies floor space while the car is there and needs a safe route over the floor. If you share the garage with a family car, a mobile cart may offer enough storage while taking up less space than a deep cabinet. A fixed cabinet avoids rolling and can store bulkier supplies, though the tools inside are less convenient to bring to the work area.| Storage choice | Works well for | Check before buying |
|---|---|---|
| Rolling chest | Hand tools you use at the vehicle | Casters, drawer slides, loaded capacity |
| Mobile cart | A small set of job-specific tools | Stability, shelf edges, wheel locks |
| Fixed cabinet | Supplies, chemicals, or less-used gear | Lock, dimensions, ventilation needs |
Use wall storage to make everyday tools easy to spot
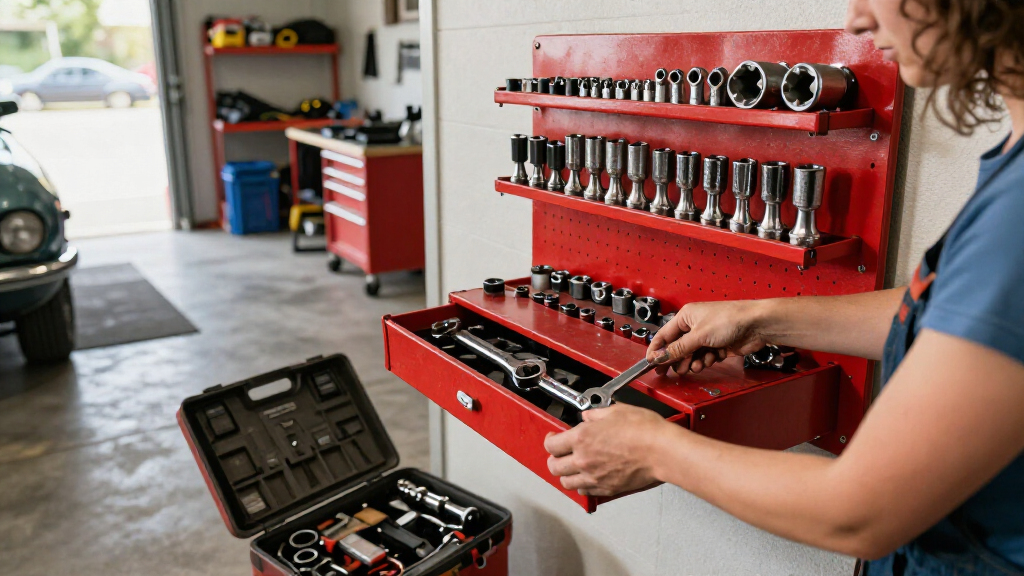
Wall storage keeps frequently used tools visible and off the workbench, which makes it easier to notice when something is missing. Pegboards offer a straightforward layout for lighter items, while slatwall panels can accommodate a broader range of compatible hooks and holders. The choice affects how easily the setup can change: pegboard layouts are simple to see and rearrange, while slatwall accessories can offer more options but may tie you to a particular system. Either system needs sound installation and accessories rated for the tools you plan to hang. Picture the tools you reach for during an oil change: a funnel, wrench, drain-pan spout, and gloves. Put them in a clear zone near the bench, rather than scattering them around the garage. This keeps a repeat task predictable and leaves the bench available for parts or instructions. Magnetic strips can hold some metal tools, while purpose-made racks can group screwdrivers, pliers, sockets, and extension cords. The right holder depends on the tool: a magnet will not hold every material or shape securely, and a crowded rack can make tools harder to remove. Check that items cannot fall when you bump the wall or pull one tool free. Before installation, locate suitable structural supports and follow the panel and fastener instructions. A hook holding a light screwdriver is a different job from a rack carrying a heavy air hose; mismatched anchors can loosen over time or fail suddenly. Keep the most-used tools around comfortable reach, and leave space to lift them on and off without striking a car door. A labeled outline or a simple photo of the intended layout can help you return tools to the right place after a late-night repair, and makes missing items easier to spot.Sort small parts so the right fastener is there when you need it
Labeled bins, divided containers, and socket rails keep small items grouped by size or task, reducing the chance that a useful fastener disappears into a mixed box. Labels should be readable at a glance and specific enough to distinguish similar parts, such as M6 bolts from M8 bolts. The detail matters because a part that looks close may still be the wrong fit; clear categories prevent a hurried guess from becoming a stripped thread or a stalled repair. After disassembling a small bracket, you might have several bolts, washers, and clips on the bench. Put them in a divided tray as you work, then move them to labeled storage if you keep extras. This simple habit prevents a handful of nearly identical fasteners from becoming a guessing game during reassembly. For sockets, use rails or organizers with clear size markings, so a missing piece stands out. A tray is convenient at the vehicle but can spill if bumped, while a latching container is safer to move but may take longer to open; choose based on whether you need temporary sorting or long-term storage.- Group items by type, size, or the repair task they serve. Keep categories narrow enough that parts remain distinguishable, but broad enough that you do not create dozens of nearly empty bins.
- Choose containers that fit the parts without mixing compartments when moved. Test the lid or dividers before relying on them for small pieces that could spill or cross-contaminate.
- Label each bin on the front and top if either view may be blocked. Use terms you will recognize while working, rather than a labeling scheme that requires stopping to decode it.
- Return spare parts to their assigned bin after the repair. Consistency preserves the time saved by sorting; otherwise, every future job begins with another search.
Plan for safe access, heavy gear, and hazardous supplies
Safe garage storage keeps heavy items low, wall systems within their rated limits, and exits and fire-safety equipment clear. Secure cabinets can limit access to hazardous products, but storage still needs to follow product labels and applicable local requirements. Ratings and instructions matter because a shelf or anchor can look sturdy while being unsuitable for the load; failure can injure someone or damage a vehicle. A tidy-looking shelf is not safe if its anchors or loading exceed the manufacturer’s instructions. If your floor jack, spare brake rotors, or battery charger sits on a high shelf, move it to a stable low cabinet or rated shelving. That reduces awkward lifting and the risk of a heavy item falling. Store oils, chemicals, and batteries as their manufacturers direct, and keep incompatible substances apart. Different products can have different storage needs, so grouping everything together for convenience may create a hazard. Keep a suitable fire extinguisher, first-aid kit, spill absorbents, and protective equipment easy to reach instead of burying them behind a cabinet. Their value depends on being accessible when a spill or injury happens, not just present in the garage. Leave a clear path around the vehicle and to doors, electrical panels, and safety gear. A practical test: park the car, open its doors, then walk from the driver’s side to the exit without stepping over a hose or squeezing past a cart. This checks the working layout under the conditions that matter, because an aisle that looks clear with the car outside may disappear once it is parked. If the garage includes high-voltage EV work or safety-critical repairs such as brakes and airbags, use a certified mechanic for that work; storage convenience does not replace proper training or equipment.Build a small-garage layout that still leaves room to work
In a small garage, use vertical wall space, compact or mobile storage, and a clear floor route to balance tool access with parking. Measure first, then place the most-used tools near the work area and bulky or seasonal items where they do not block doors or exits. Buying storage before measuring can leave drawers jammed against a car or shelves too deep for the space. The goal is not to fit the most containers; it is to keep the tools you need reachable while preserving enough open floor to move safely. For instance, a one-car garage might use a narrow rolling chest under a workbench, a wall panel for daily hand tools, and shallow bins for small parts. Move a mobile cart to the vehicle during a repair, then park it beside the bench afterward. This creates a before-and-after change you can feel: fewer boxes underfoot, a visible patch of floor, and no need to shift three items just to reach one wrench. The compact arrangement has tradeoffs: shallow bins may not fit bulky supplies, and a narrow chest may require more careful drawer organization. Those limits are easier to manage when the layout follows your actual projects. Start with these steps:- Measure the wall, bench, and floor, including the space needed for doors and drawers to open.
- Sort tools into daily-use, occasional-use, and bulky groups.
- Place the daily-use group near the work surface or vehicle.
- Keep heavy items low and use shelves rated for their load.
- Test the layout with the vehicle parked before adding more storage.
Compact storage often costs more per unit of capacity, so compare dimensions and useful features rather than chasing the smallest product. Add pieces as your habits become clearer. Testing the layout first can show whether a mobile cart earns its floor space or whether a fixed wall holder serves the same tools more simply.