To switch greases properly, start by confirming the bearing is at the correct temperature and clean the grease fitting thoroughly. Use a compatible fresh grease and pump steadily until old grease and contaminants are pushed out, signaling a complete swap. Keep pressure controlled to avoid damage. If you encounter clogs or insufficient flow, troubleshoot before continuing. Mastering these steps guarantees smooth, contamination-free grease switches—stick with us to discover more proven techniques.
Key Takeaways
- Ensure the bearing is at operating temperature before starting the purge for optimal grease flow.
- Clean the grease fitting and purge port thoroughly to prevent contamination during the switch.
- Pump fresh grease steadily until it displaces old grease completely and flows clean from the purge point.
- Confirm grease compatibility to prevent chemical or performance issues when switching types.
- Continue purging until only clean grease appears, ensuring a full and effective grease transition.

MOTOQUEEN for Dirt Bike Swingarm & Linkage Bearing Grease Tool Kit – 18mm 20mm 22mm Adapters – Professional Bearing Maintenance Tool
Fitment: For Honda, Kawasaki, KTM, Suzuki, Yamaha, Husqvarna, GasGas, Triumph, and Ducati. Compatible with KTM mini swingarms. Fits…
As an affiliate, we earn on qualifying purchases.
As an affiliate, we earn on qualifying purchases.
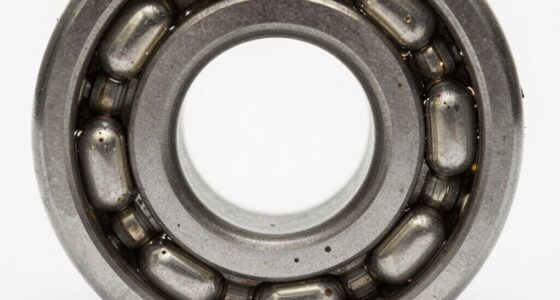
Why Proper Grease Purging Is Critical for Bearing Longevity
Proper grease purging is essential for extending bearing life because it guarantees contaminants like dirt, dust, and old grease are effectively removed. When you don’t purge correctly, these impurities can accumulate, causing abrasive wear and corrosion that shorten bearing lifespan. Proper purging ensures that fresh, clean grease reaches all bearing surfaces, maintaining ideal lubrication. It also prevents heat buildup caused by grease blockages, which can lead to premature failure. Inadequate purging leaves old grease and contaminants trapped, risking increased vibration, noise, and damage. By following the right purging procedures, you help maintain consistent lubrication, reduce maintenance costs, and greatly extend bearing service life. Clear, contaminant-free grease is the foundation for reliable, long-lasting bearing operation. Effective lubrication practices are crucial for minimizing downtime and ensuring optimal performance over the long term.

BuildMaven Grease Fitting Cleaning Tool -Grease Zerk Cleaner, Zerk Fitting Cleaning Tool, Remove Old Dried Grease from Fittings, Pins, Shafts, Bushings, and Joints (Red)
No More Clogged Grease Zerks: Grease Fitting Cleaning Tool is designed to clean out old, dried grease from…
As an affiliate, we earn on qualifying purchases.
As an affiliate, we earn on qualifying purchases.
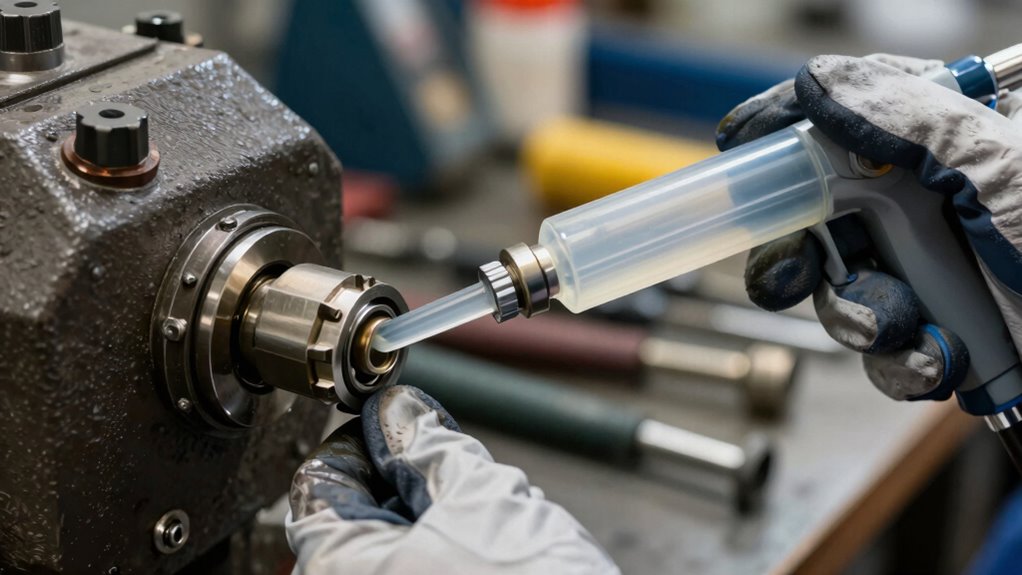
How to Choose the Best Grease Purge Method for Your Bearings

Choosing the right grease purge method depends on your bearing type, operating environment, and maintenance practices. For low-speed bearings with DN under 50,000, a fresh grease purge works best—simply lubricate until new grease flows out. If your bearing has a drain plug, remove it, clean out old grease, and pump in fresh until contamination exits. For bearings without drain plugs, run the equipment at operating temperature, then remove the fitting and pump a limited amount of grease, running the machine to purge. Consider the environment—high contamination areas may require more thorough purging methods. Always verify compatibility of the grease type and ensure the purge method aligns with your bearing’s design and sealing features. Proper selection minimizes contamination risk and extends bearing life. Additionally, understanding the contamination control principles helps optimize the purging process and prolong bearing performance.

Sea-Doo OEM XP-S Jet Pump Bearing Grease, 9779703
3.7 fl oz
As an affiliate, we earn on qualifying purchases.
As an affiliate, we earn on qualifying purchases.
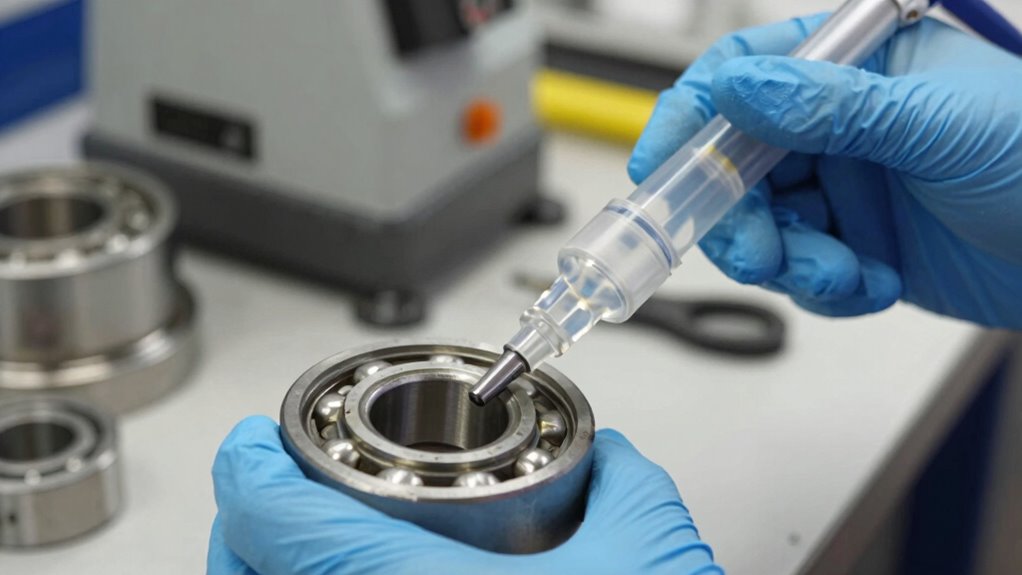
Step-by-Step: Performing a Fresh Grease Purge Correctly

To perform a fresh grease purge correctly, start by verifying the bearing is at its normal operating temperature. Warmth helps the grease flow smoothly and ensures thorough purging. Next, identify the appropriate purge point—usually the seal interface or purge port. Pump fresh grease steadily into the bearing until you see it emerge from the purge port or seal area, indicating old grease is being displaced. Maintain consistent pressure to avoid over-pressurizing, which could damage seals. If the bearing is designed for a total loss system, ensure the discharge path is clear. Continue until the discharge is clean and free of contaminants. Proper lubrication techniques help extend bearing life and maintain optimal performance. Finally, wipe the grease fitting clean and check for proper purge flow. This process guarantees effective removal of old grease and contaminants.

DEWALT Grease Gun 20V MAX, Cordless Electric Grease Gun 42” Hose, 10,000 PSI, Variable Speed Triggers, Tool Only (DCGG571B)
DEWALT cordless grease gun can power through clogged grease fittings with a motor that delivers up to 10,000…
As an affiliate, we earn on qualifying purchases.
As an affiliate, we earn on qualifying purchases.
Troubleshooting Common Grease Purging Problems Like Clogs and Insufficient Purge
When grease purge problems like clogs or insufficient flow occur, addressing them quickly is essential to maintain bearing performance. First, identify the root cause—blockages, incompatible grease, or debris. Clear clogs by removing the fitting and flushing the line with solvent or compressed air. Check for contamination or hardened grease blocking the passage. If purge flow remains weak, verify grease compatibility and ensure correct application techniques. Adjust pump pressure or replace clogged fittings. Use this table to troubleshoot common issues:
| Issue | Possible Cause | Solution |
|---|---|---|
| No purge after pumping | Clogged or blocked fitting | Clean or replace fittings |
| Insufficient grease flow | Wrong grease type or viscosity | Switch to compatible grease |
| Grease contamination | Dirty or damaged purge line | Flush or replace contaminated parts |
Best Practices for Safe and Effective Grease Switching
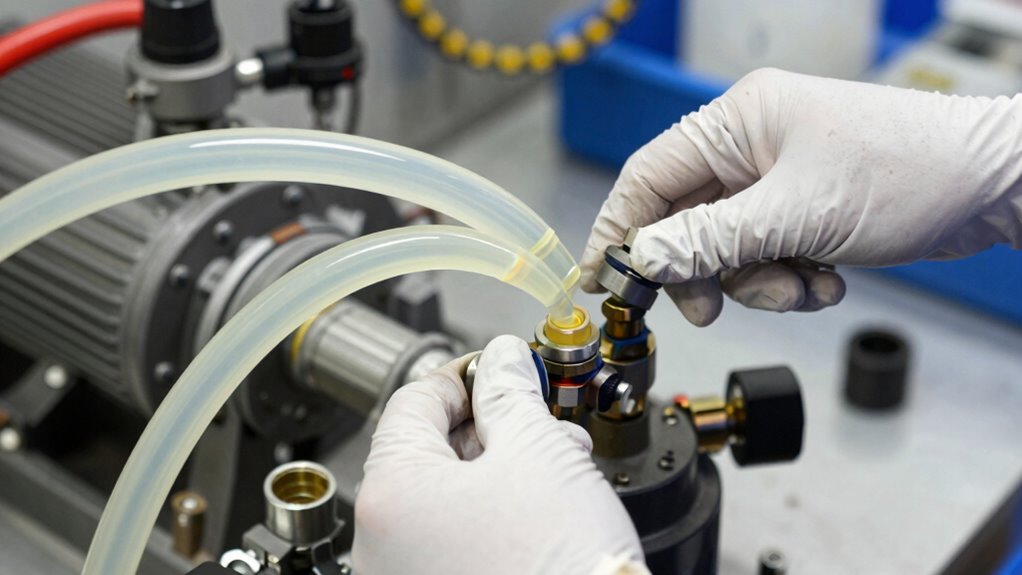
Properly switching grease types is essential to guarantee bearing longevity and maintain ideal performance. Begin by cleaning the grease fitting and purge port thoroughly to remove old grease and contaminants. Use the appropriate purge method—either fresh grease or drain plug—to displace the existing grease completely. Always verify compatibility between the old and new greases, ensuring they share similar base oils and thickener types. Pump the new grease until you see clean, fresh grease emerging, indicating the old grease has been replaced. Run the equipment at operating temperature to facilitate thorough purging. Regularly inspect for signs of contamination or incomplete purge, and avoid overfilling to prevent heat buildup. Understanding grease compatibility is crucial to prevent chemical reactions that could damage bearings. Following these best practices ensures a safe, effective grease switch that protects your equipment.
Frequently Asked Questions
Can I Reuse Old Grease After Purging?
You shouldn’t reuse old grease after purging. Purging removes contaminants and old lubricant, but it doesn’t restore the grease’s original properties. Reusing it can lead to contamination buildup, reduced lubrication, and potential equipment failure. Always replace old grease with fresh, compatible lubricant to guarantee ideal protection. This practice keeps your machinery running smoothly and extends its lifespan, avoiding unnecessary repairs caused by contaminated or degraded grease.
How Often Should I Perform a Grease Purge?
Think of your machinery like a well-tuned orchestra—timing matters. You should perform a grease purge whenever you’re switching grease types, after contamination, or during scheduled maintenance, usually every 6 to 12 months. In high contamination environments or critical equipment, consider more frequent purging, like quarterly. Regular purging keeps contaminants out, extends bearing life, and guarantees ideal lubrication—your secret to smooth, reliable operation.
Is Purge Lubrication Suitable for All Bearing Types?
Purge lubrication isn’t suitable for all bearing types. It works best with low-speed bearings like hinges, bushings, or open bearings that can handle the purge process and have proper venting. Avoid using it on high-speed, sealed, or critical bearings that require precise lubrication control. Always check your bearing specifications and manufacturer recommendations before implementing purge lubrication to guarantee it’s appropriate and won’t cause damage or performance issues.
What Are Signs of Improper Grease Purging?
You’ll notice signs of improper grease purging if you see no fresh grease emerging during the process, indicating a clog or dry bearing. Unusual heat buildup, persistent noise, or increased vibration also suggest inadequate purging. Additionally, if old grease doesn’t displace or if the purge path remains blocked, it’s a clear sign. Regular inspection guarantees contaminants aren’t trapped, keeping your equipment running smoothly and preventing damage.
How Do Environmental Conditions Affect the Purge Process?
Think of environmental conditions as the weather shaping your purge journey. Harsh environments like dust, water, or extreme temperatures can hinder grease flow, making purging less effective. Dust can clog the path, water can wash away fresh grease, and cold or hot temps can thicken or thin grease, delaying purge completion. To succeed, adapt your approach—use protective seals, warm up bearings, or choose appropriate grease types—to guarantee a thorough purge.
Conclusion
Remember, switching grease isn’t just a routine—it’s your bearings’ shield against wear and failure. Like a skilled captain steering clear of hidden rocks, follow the proper purge steps to guarantee smooth operation and longevity. Ignoring these practices risks unnecessary damage, akin to sailing into storms unprepared. By taking the right approach, you’re guarding your equipment’s future, proving that careful maintenance is the true mark of a seasoned professional. Stay vigilant, and your bearings will thank you.